|
Ducking lowers the level of microphones and program material (based on a source signal from another microphone) for the duration of the signal that is present at the source microphone. It restores the original level after the source signal ceases and after the hold and release times are met. This is useful when:
|
Inserting a Ducker BlockDUCK (ducking) processor blocks are inserted individually from a context menu. However, you can set up ducking globally from a single configuration window, which opens when you double-click any of the active Ducking processor blocks. When you insert a ducking processor block, the Enable Source Mic/Line check box is automatically selected. All inactive Ducking processor blocks have the Enable Source Mic/Line check box cleared by default. To insert a ducking processor block:
You can also insert a ducking processor block from an open Ducker Configuration dialog box. To do so:
|
![]()
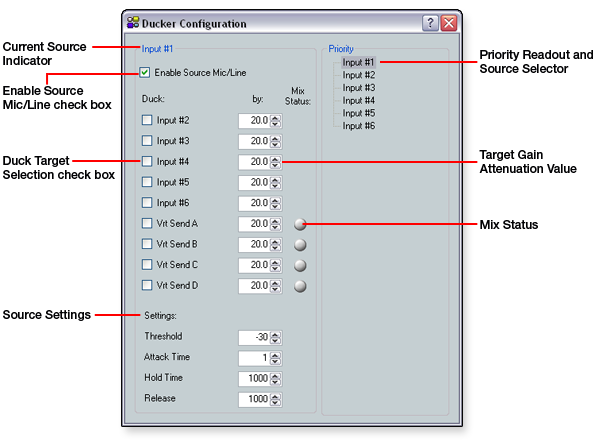
Ducker Configuration Dialog ComponentsTo open the Ducker Configuration dialog box, double-click the DUCK block. The dialog contains the following components:
|
![]()