Group MastersThere are 32 Group Masters that can be configured to control up to 16 Group Members. Group Masters are configured in the DSP Configurator program and are saved in the device. Working in Emulate mode, Group Masters can be saved in a configuration file and pushed to the device upon connection. A Group Master can be either a gain control or a mute control. One control type can be selected for Group Members, to be controlled by a Group Master. For example, a Group Master can be configured to control Post-mixer Trim levels, but not Post-mixer Trims plus another type of Gain block. A Group Member can, however, be controlled by multiple Group Masters. It is recommended that this feature be used cautiously, as "overlapping" membership can quickly become unmanageable. See below, Multiple Group Masters, for more information. Group Master gain controls can send specific values, such as those sent by a fader control. Group Master gain can also be set by increment/decrement. (See below, Group Controls | Tools for information on using increment/decrement controls within the DSP Configurator software.) Information on commands for Group Master controls to be used in a control system can be found in the User's Manual for the device. Configure Groups
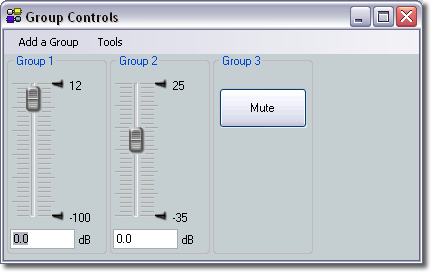
View Group ControlsGo to View | Group Controls to open a window that displays all current Group Master controls. This window can be resized to a convenient shape. The Group Controls dialog contains two menu items:
Add a GroupTo launch the Configure Groups dialog from the Group Controls window, click Add New Group. When a new group is added and the Add New Group dialog is closed, the Group Controls window refreshes to display the added control. ToolsThe Tools menu contains three selections:
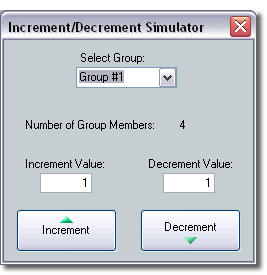
The Increment/Decrement Simulator provides a temporary control for increment and decrement, with the ability to set the increment and decrement values. This control is temporary, since this value is not remembered in the device. The default value is 1. To use the Increment/Decrement Simulator:
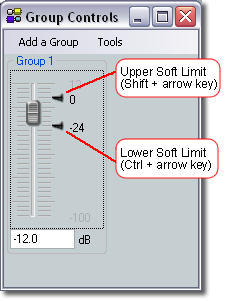
Soft LimitsEach gain type control provides upper and lower soft limits that can be used to limit the range of the Group Master control. When a Group Master is created, these soft limits default to the inherent "hard" limits of that particular control, i.e., the upper and lower limits defined by that control. Soft Limits can be defined using the following methods. A. Click + drag the Soft Limit handle. The Soft Limit resolution is 0.1dB B. Click within the Group Master fader to bring focus, then use the following key combinations.
Group MembersOnce a group has been created, the Group Members, i.e., the individual controls that comprise the group, update to indicate that they are now part of a group. Group Members can still be controlled individually, allowing for relative levels between Group Members to be fine-tuned. Group Member levels can also be set by a preset recall.
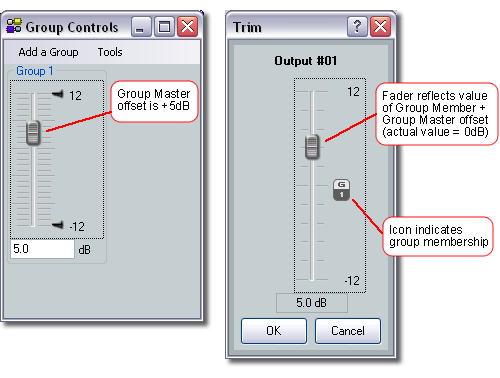
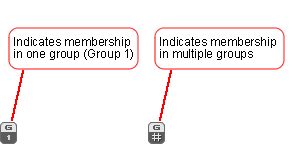
The DSP Configurator software displays the Group Member value plus the offset created by the Group Master. In that sense, the GUI always displays the value that you are hearing. However, the value of the Group Member in the device is always the actual value, independent of the added offset value of the Group Master. If a Group Master is deleted, the Group Member value reverts to its actual value. Multiple Group MastersA Group Member can be controlled by multiple Group Masters. It is recommended that this feature be used cautiously, as "overlapping" membership can quickly become unmanageable. Multiple Group Masters can be useful when, for example, Group #1 controls volume in Room A, Group #2 controls volume in Room B, and Group #3 controls volume in combined Room A + B. NOTE: When multiple Group Masters are used, the offset value that is added to the Group Member value is the sum of all Group Masters acting on the Group Members. When configuring a group, Group Members that are already being controlled by another master are indicated with a blue font in the Available Group Members list. After the group is created, the control dialogs for each Group Member change from displaying membership in a single group to displaying membership in multiple groups.
|