|
To start Global Configurator (GC):
Note: If you have downloaded the GC application from the Extron Web site, and the shortcut icon is not present on the desktop, start GC by clicking: START > All Programs > Extron Electronics > GCX.X |
|
|
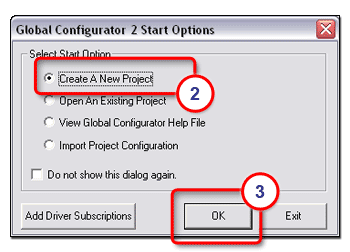
The Global Configurator application opens and displays the Start Options dialog box.
|
|
|
The Project Settings dialog box opens.
|
|
|
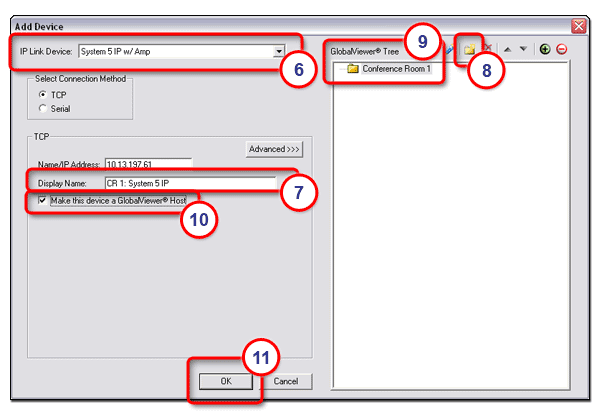
The Add Device dialog box opens.
Note: A GlobalViewer Host is a device that will launch the GlobalViewer application if its IP address is accessed in an Internet browser. Devices that are not designated as a GlobalViewer Host can be monitored and controlled from any GlobalViewer Host device on the same audio/visual network.
|
|
|
|
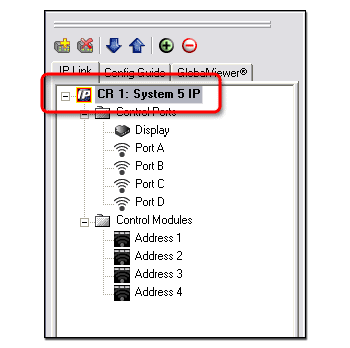
The GC2 Project opens and displays the first network device in the IP Link Tree window (shown at right).
To view the new device in the Device Locations window (see below):
The new location and new device are displayed in the Device Locations tree (2).
|
|

|
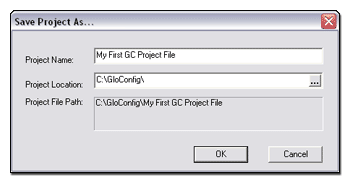
To save the new Global Configurator project file:
The Save Project As... dialog box opens (shown at rights).
|
|
![]()