|
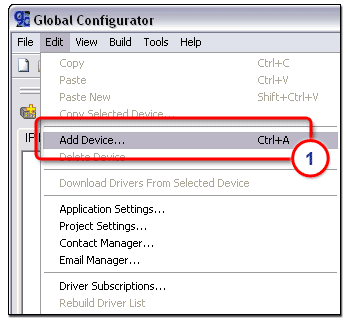
There are three ways to launch the Add Device dialog box:
|
|
|
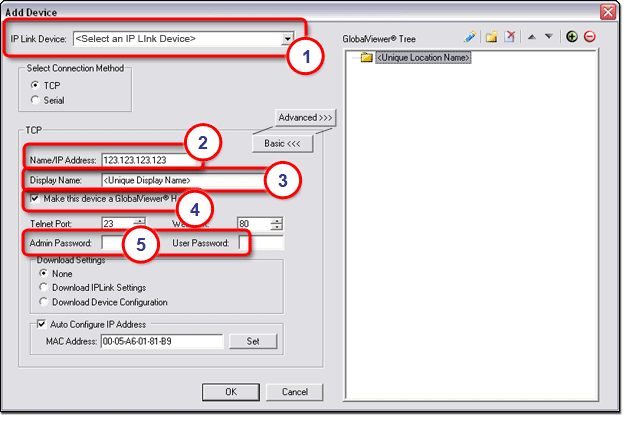
With the Add Device dialog box open (see below):
Note: A GlobalViewer Host is a device that will launch the GlobalViewer graphical user interface if its IP address is accessed in an Internet browser. Devices that are not designated as a GlobalViewer Host can be monitored and controlled from any GlobalViewer Host device on the same audio/visual network.
|
|
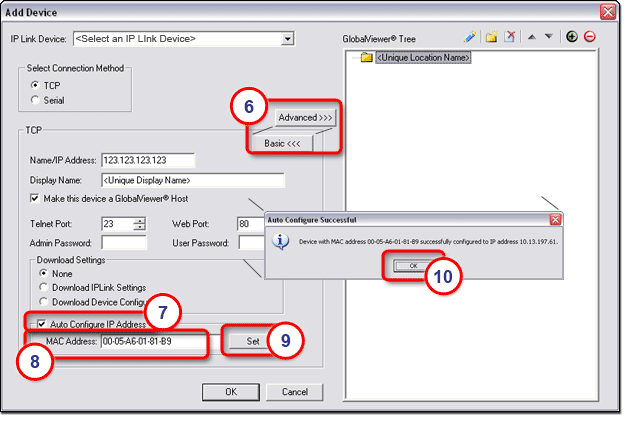
With the Add Device dialog box still open (see below):
The Auto Configure Successful dialog box is displayed.
|
|
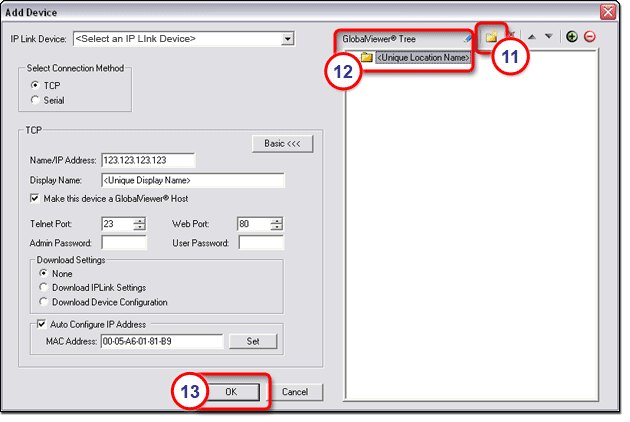
With the Add Device dialog box still open (see below):
The new device is added under the New Location folder, and the Add Device dialog box closes. |
|
The other Advanced options (shown in the illustration above) include: |
|
Telnet Port: |
Default is Port 23. Select a different port number to increase the security level of this device on the network. |
|
Web Port: |
Default is Port 80. Select a different port number to increase the security level of this device on the network. |
|
Admin Password: |
If the device has an admin password, it must be entered in this field, or GC will not be able to communicate to the device. |
|
User Password: |
If the device has a user password, it must be entered in this field, or GC will not be able to communicate to the device. |
|
Download Settings: |
When adding a new device, choose from the three Download Settings options shown below. |
|
None: |
Download no existing settings from the new device - settings for the new device will be set manually within the GC application. |
|
Download IPLink Settings: |
If the new device previously existed on a network and was configured using GC software, use the Download IP Link Settings option to bring in the existing device IP settings when it is added as a new device to the current network. |
|
Download Device Configuration: |
If the new device previously existed on a network and was configured using GC software, use the Download Device Configuration option to bring in the existing device configuration settings when it is added as a new device to the current network. |
|
Auto Configure IP address: |
Automatically assigns an IP address to the new device. To use Auto Configure IP address the following rules apply:
|
![]()
|
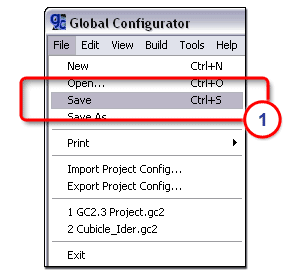
To Save the project file:
|
|
![]()
|
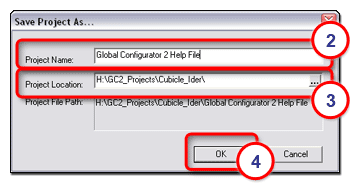
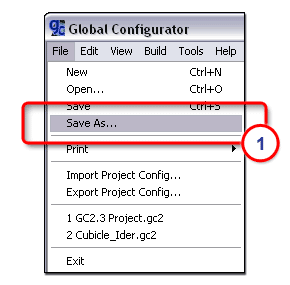
To Save As... the project file:
|
|
|
The Save Project As... dialog box opens.
|
|
![]()
 ) to the desired new location.