|
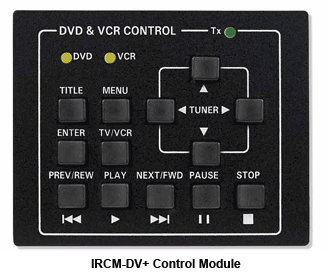
A Control Module is a plate
with buttons that can be associated with a System 5 IP, mounted into an
MLC 226 or an The buttons on a Control Module can be configured to perform specific device operations, such as power on a device, or raise/lower audio volume, etc. The Control Module Summary tab is used to configure the button operations of a Control Module. |
|
![]()
|
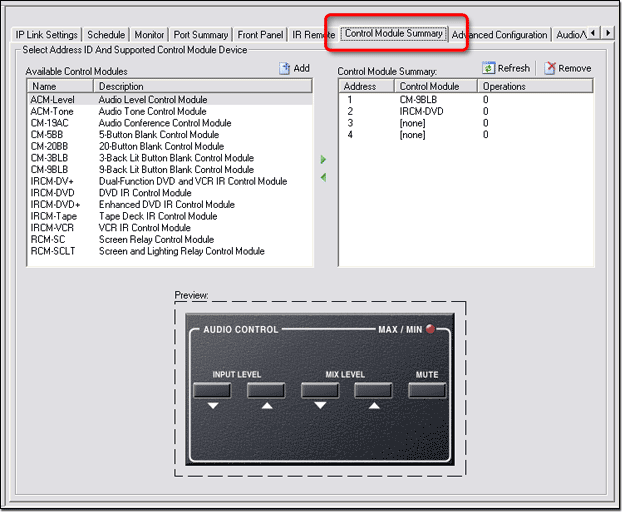
To configure a Control Module button:
|
|
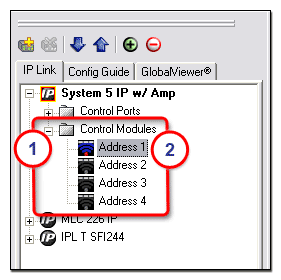
The Control Module description appears in the Control Module Summary section and the IP Link Tree window. |
|
|
|
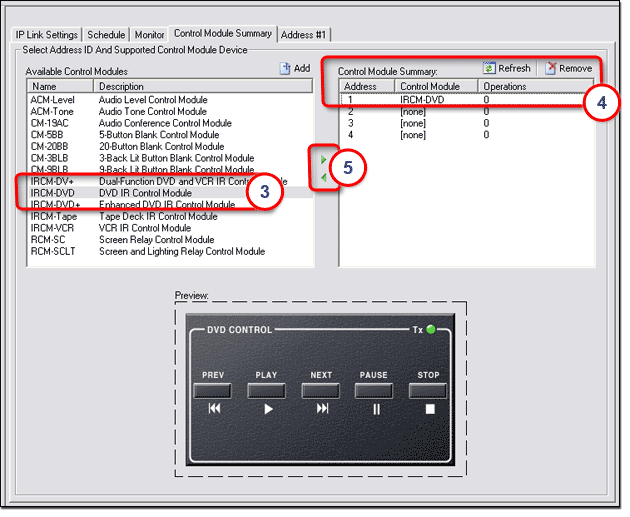
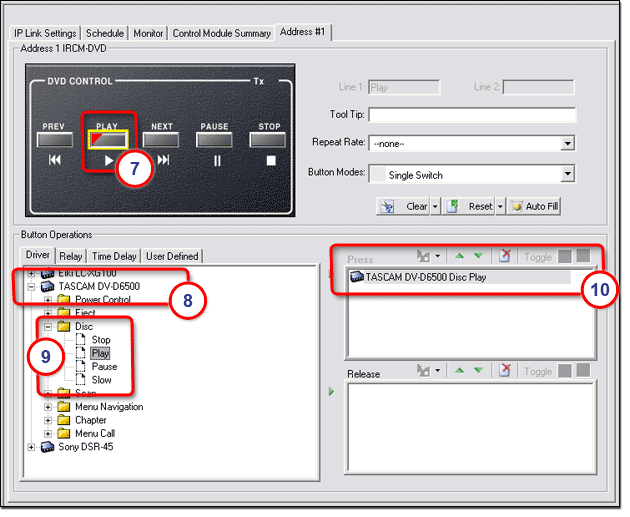
The Address #1 tab opens and displays the selected Control Module (see below).
A red triangle in the top, left corner of the affected button (7) indicates that the button has been configured. In the example below, we have added the Play operation to the Press action of the Control Module's PLAY button. Note: All of the button functions must be configured here in the Address #1 tab for them to be operational. |
Clear, Reset, or Auto-Fill Button LabelsThe Clear button is used to clear all of the button captions. (Clear only applies to Control Modules with non-pre-determined button captions). The Reset button is used to return button operations to their factory default states. The Clear and Reset buttons have the option to select "this button" or "all buttons." The Auto Fill button is used to configure all buttons with pre-determined button operations as defined by the associated device driver. |
|
|
The Relay, Time Delay, and User Defined tabs in the Button Operations section allow you to add button operations to each button. For more information see: |
![]()